Showing posts with label stamping. Show all posts

Thursday, June 27, 2019

Trinity Stamps Anniversary Blog Hop

Hi Friends!! Thank you so much for stopping by on the blog hop. I am so excited to be participating in Trinity Stamps' One Year Anniversary Blog Hop! I hope that you enjoy the hop and are in love with all of the new release!


The Narrow Card & Envelope Dies set comes with alot of fun pieces.
 This narrow scalloped & stitched card was so fun to use. I used Distress Oxides to stencil in the rays and taped off the edges to make the scallop border pop!


The Narrow Card & Envelope Dies envelope die has a heart and a postage stamp die, so I cut and colored these with Distress Oxides. The With Love dies were cut also part of this awesome die set! I used Squeezed Lemonade Distress Oxides to color those words.
Using the Layered Confetti Stencil Set, I again used my Distress Oxides to create the streamers and confetti on the envelope. Perfect for a fun birthday card!


The next person in the lineup is the AMAZING Laurie Willison
Don't forget to stop and comment along the hop to be entered to win prizes! If you need to start from the begining, click here.

Be sure to stop in and shop. There are lots of amazing new embellishments & 
some fun freebies with a purchase!


Thank you so much for stopping by! 
Crafty Hugs,
Lisa

Friday, September 21, 2018

Honey Bee Stamps & Heffy Doodle Collaboration Insta Hop !


Hi Crafty Friends! 
I am so excited to be participating in the Honey Bee Stamps & Heffy Doodle 
Collaboration Hop on Instagram.
Please be sure to stop by my Instagram here: Lisa Cisneros to join in on the hop.

For this card, I used the Honey Bee Stamps Birds & the Bees Stamp set & coordinating Honey Cuts, the Honey Bee Stamps Happy Honey Cuts Die & the Heffy Doodle Wingman Stamp & Die set.

Thanks for stopping by & be sure to join us on the Instagram hop! Leave comments on the hop to be entered to win a $30 gift card from both companies. Winners will be posted on their blogs on 9/28.
Hugs,
Lisa

Friday, June 8, 2018

Honey Bee Stamps & WOW Embossing Blog Hop

Hi Friends!!
                                        Welcome to a very special Blog Hop collaboration with the
                                            Honey Bee Stamps & WOW! Embossing Powder.

 If you are hopping along, you should have come from Julie Hickey and the next on the hop is my friend Melissa Bickford. 

For today's projects, I created my cards using the WOW! Opaque Pastel Pink Embossing Powder. It was so fun to create some clean & simples cards with a pop of pink embossing. I hope you enjoy these cards & are inspired to try them out yourself.

For this card I used the Love you Honey Cuts Die, the Stitched Scallop Circle Die set to create a focal point on the card. I used the embossing powder to emboss the dies and the strip of cardstock on the side. This way it was all coordinating in color. I added some heart embellishments to carry the pop of pink color throughout the card.
Here is a close up showing the Pastel Pink embossed dies.
For this card I used the Sweet Honey Cuts die and the heart embellishment to add a little something extra. I cut the die several times and created a background for the card using all white for a tone on tone look. I embossed the Sweet Honey Cut Die with the WOW Pastel Pink Embossing Powder to have a pop of color.
Here is a close up to show the embossing powder detail. I am in love with this pretty pastel pink!!!


***GIVEAWAY***
No blog hop is complete without some prizes. Are you ready for some awesome giveaways? Each Company is giving away the following:
Honey Bee Stamps - $50 Gift Card
WOW! Embossing Powder- Any 6 powders of your choosing & a WOW carrying case 
The only think you need to do for a chance to win is leave a comment on each of the design team member’s blog for the hop.
The Winners will be chosen at random from the comments left on ALL THE POSTS of this blog hop by 12 pm EST on 14th June 2018. and will be announced on the blog on 15th June 2018.

Thursday, May 31, 2018

Trinity Stamps Grand Opening Blog Hop

Hi Friends!! Thank you so much for stopping by on the blog hop. I am so excited to be participating and supporting my friend on her grand opening celebration. I hope that you enjoy the hop and are in love with all of her new release!

The Trinity Stamps First Release is now available in the store.

Now, onto my projects! 
For the first card I created, I used the 4x6 Succulent Banner set and coordinating dies. I am a sucker for anything succulent, so I fell in love with this stamp set! It's so versatile and fits so well on a card base!
To color the image I used Copic Markers: R11, R22, R32, YG03, YG67 & YG99. For the background, I used Distress Oxide ink in Peeled Paint on a Simon Says Stamp stencil called Tap Dance.
 I chose the "Thankful" sentiment to stamp inside the banner. & added a few jewels in the coral color just for an added pop of coral!

 For the next project, I used the Let Love Grow stamp set and coordinating dies.
 To color the image I used Copic Markers: R11, R22, R32, BG10, YG03, YG67 & YG99. For the background, I used Distress Oxide ink in Broken China on an Avery Elle die.
Here is the fantastic lineup:
   Trinity Stamps  
Lisa Cisneros <You are HERE>

Be sure to visit each blog & leave a comment to be entered to win!! They are giving away a $50 gift card to the Trinity Stamps store, a $20 gift card to Therm-o-web, $25 Ellen Hutson Gift Card, $25 Simon Says Stamp Gift Card and a $25 gift card to WOW Embossing. There are plenty of chances to win one of these fantastic prizes. Thank you so much to all the Sponsors!!  The winners will be posted on the Trinity blog on June 5th.
Crafty Hugs,
Lisa

Tuesday, May 15, 2018

I Miss You Florals

Hi Friends!
Today I am sharing a card I created using the Honey Bee Stamps Spring Blossoms stamp & Spring blossoms Honey Cut dies. These florals are some of my favorite images from this release!!

I colored these florals using Copic R22, R32 and R11. The sentiment is one I just adore                                             from the Love Bug Sentiment stamp set.


  I also used the Branch & Leaves Honey Cut dies. I also used the Best Parents stamp set.                            To color the flowers I used Copic Markers: R11, R22, R32. 

For the tree branch and leaves, I used: YG03, YG67, YG99, E15, E25, E27, E29. For the                                 background, I used Distress Oxide ink in Peacock Feathers. 


Thank you so much for stopping by! 
Happy Crafting, Lisa
(affiliate links are provided at no cost to you. Thank you for your support!)

Tuesday, May 1, 2018

Honey Bee Stamps Spring Release Blog Hop

Hello friends! Thank you so much for stopping by on the hop. I am so excited to show you some fun, new products today!
The Honey Bee Stamps Spring Release is now available in the store. (affiliate links are used)

Be sure to visit each blog & leave a comment to be entered to win!!! Honey Bee Stamps will be giving away two $50 gift cards to the Honey Bee Stamps store, one from each day AND four Bee Organized prize packs. The winners will be posted on their blog May 5th.

Now, on to my projects from the release. 
The first project I created using the Spring Blossoms stamp & Spring blossoms Honey Cut dies. I colored these florals using Copic R22, R32 and R11. I outlined the floral cluster I created in BG10. The sentiment is one I just adore from the Love Bug Sentiment stamp set.


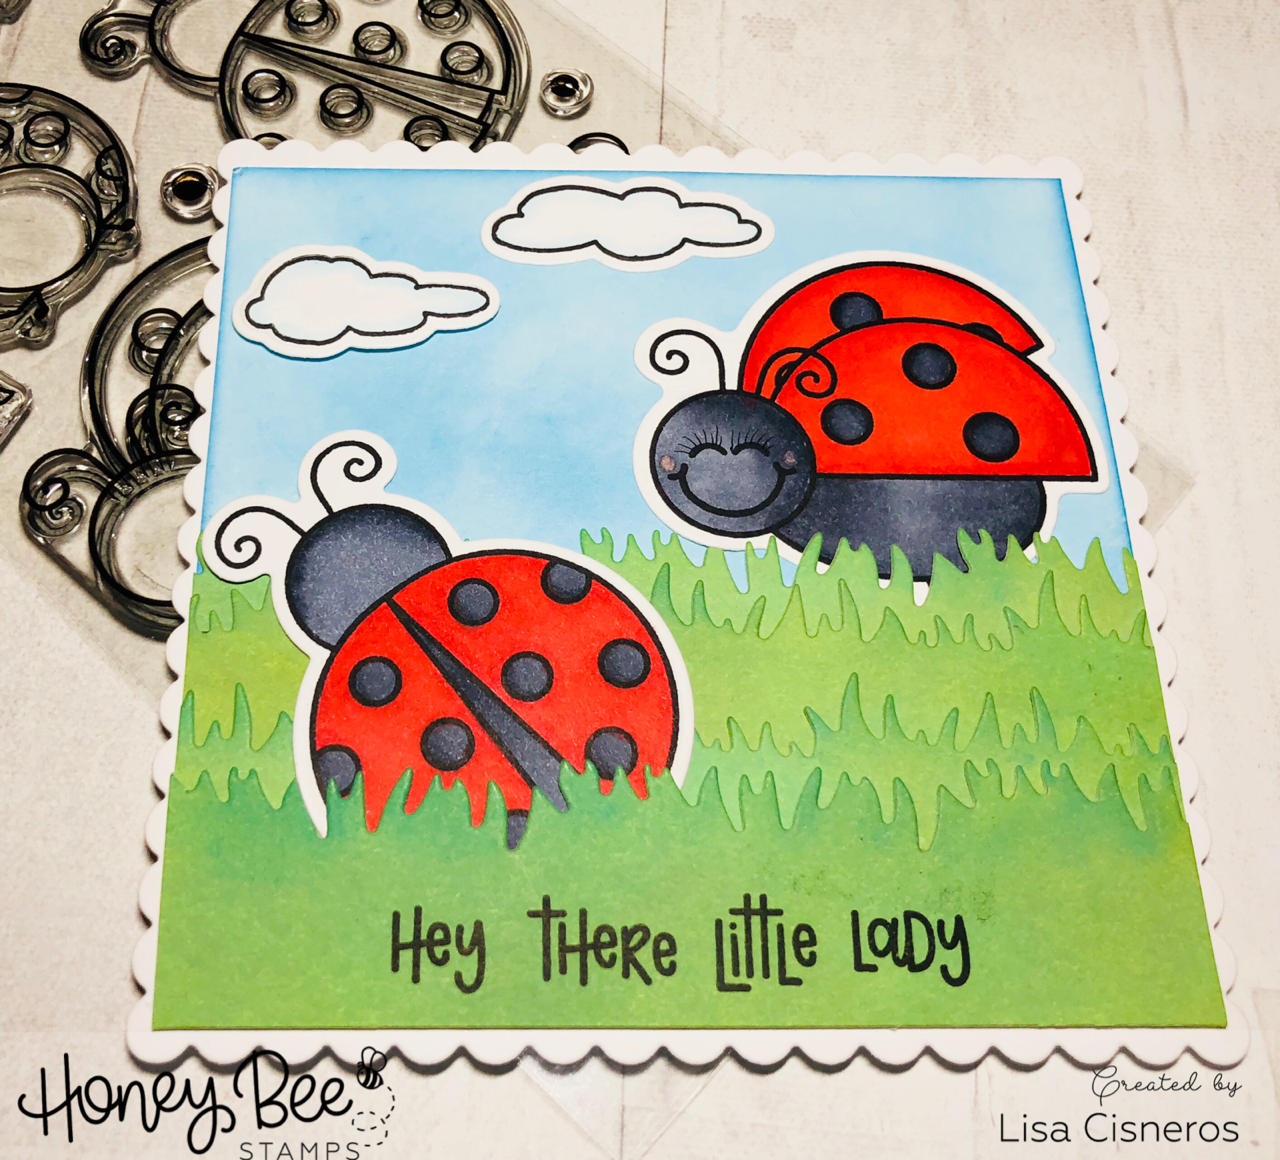
For my next card, I used the Little Ladies stamp set and Little Lady Honey Cut dies. I also used the Grass Border Honey Cut die and the clouds are from the Heaven Sent stamp set & Heaven Sent Honey Cut dies.

The lady bugs are colored using Copic Markers: R24, R27, R29, C3, C7, C9. The grass and sky are colored using Distress Oxides: Broken China , Cracked Pistachio & Lucky Clover


The final project is a mother’s day Card that I created for my amazing mother to celebrate Mother's Day. She is always my biggest champion & what better way to show her than these florals!

I used  the Spring Blossoms stamp & Spring blossoms Honey Cut dies.  I also used the Branch & Leaves Honey Cut dies. I also used the Best Parents stamp set. To color the flowers I used Copic Markers: R11, R22, R32. For the tree branch and leaves, I used: YG03, YG67, YG99, E15, E25, E27, E29. For the background, I used Distress Oxide ink in Peacock Feathers. 


Here is the fantastic lineup:
Lisa Cisneros (you are HERE)
Thank you so much for stopping by & don’t
 forget to comment to be entered to win!!

Saturday, October 7, 2017

World Cardmaking Day with Honey Bee Stamps & Chibitronics


Welcome Crafty Friends!
Thank you so much for stopping by for a fantastic World Cardmaking Day Blog Hop. Honey Bee Stamps & Chibitronics have joined together to celebrate today in a big way! I hope you enjoy the project I created today. (Affiliate links are used below, thank you so much for your support. It is appreciated!)

I was in the Holiday mood when I started thinking about my project, so I decided to play around with our fun Christmas themed sets from Honey Bee Stamps.

First I picked the images that I wanted to use and put them in my Misti to make sure to get a crisp image when I stamped.

I then took my Distress Oxide Inks and created a snowy sky for the cardbase.

I played around with how I was going to lay out all the images after I copic colored them. I also used my Marvy Uchida Snow Marker to create snow falling & embossed the snowflakes from the stamp sets in glitter white twinkle embossing powder from WOW to create additional sparkle.

Next, I started to work on lining up the copper tape for the inner working of the light and battery from the Chibitronics Starter Set.  I premarked where my star was and where I wanted to *push* for the light to shine.

Then I added all the foam tape from the Scotch Foam Tape Roll so that I could create a pocket for the battery so the light would not stay on constantly.

 Here is the final version showing the light shining with full lights on.

And here is the project with the light shining with my interior lights off.


I used the following items:

 Flakey Friends Stamp set & coordinating Honey Cut dies

More Flakey Friends & Honey Cut dies

Let it Snow Stamp set

Chibitronics Starter Set

Chibitronics Colored Light set

Marvy Uchida Snow Marker


Stick It Adhesive Sheets

Scotch Foam Tape Roll

Distress Oxide Inks: Broken China & Salty Ocean


Be sure to leave comments along the hop. Honey Bee Stamps is giving away a $25 Gift Certificate to one winner & Chibitronics is giving away 1 Starter Kit to a winner along the hop.
Also for one day only....Honey Bee Stamps is having a WCMD SALE!!!!


Below is the Blog Hop Lineup:


Thanks again for stopping by & Happy World Cardmaking Day to all my crafty friends!!!

Friday, September 29, 2017

Honey Bee Stamps Stamptember Collaboration


Hi Crafty Friends!!! I am so excited to be sharing the Honey Bee Stamps Stamptember set. This
           set is called Remarkable You. This set is available for a limited time while supplies
                                      last.  (affiliate links are used at no cost to you. Thank you for your support!)
              Here is a fun card I created using the Remarkable You set and the Busy Bees stamp set.


                                               Thanks for stopping by & I hope your day is fantastic!!

Tuesday, June 27, 2017

A Honey Bee Hello!


Today I am sharing a fun card that I created using Honey Bee Stamps products. 
*In order to support my blog, Affiliate links are used where available at NO cost to you. Thank you for your support!*

First off, I cut the Stacking Hexagon Cover plates dies and cut them using Bazzill Basics cardstock.  
Once I had them all cut, I layered each one using the Nuvo Deluxe Adhesive because it gives you a minute to get it situated and dries clear! I used Scor-Tape on one of the bee images. I just love how strong it is!


 Next up I stamped and cut out the Busy Bee stamp set & coordinating dies and the Hello set and coordinating Honey Cut dies.  

I embossed the word Hello using the Hero Arts Heat Tool and some Nuvo Crystal Clear Embossing Powder and Avery Elle Mimosa Pigment Ink. 
 I colored the bee images in with my Copic Blending Trio Markers on some Neenah Classic Crest Smooth 110 lb cardstock. 

I also put the Hampton Arts Mini Action Wobblers behind the two Busy Bee stamps  just to make the card that much more fun!
I hope you enjoyed my project today.  Thanks for looking and have a fantastic day!!

Saturday, June 24, 2017

Bee Happy!

Hi Crafty Friends!

Today I am sharing a fun card that I created using Honey Bee Stamps products. Be sure to click the link and visit the shop for the flash sale. Use the code : summer

*In order to support my blog, Affiliate links are used where available at NO cost to you. Thank you for your support!*


This card was so much fun  to create! Have you ever had a day that you felt a little down? Today was that day for me, so I made myself pick some supplies that I love and just see what happened. LOL! Well, here are the results. 

First off, I cut the Stacking Hexagon Cover plates dies and cut them using Bazzill Basics cardstock.  
Once I had them all cut, I layered each one using the Nuvo Deluxe Adhesive because it gives you a minute to get it situated and dries clear! I used Scor-Tape on all the bee images. I just love how strong it is!


 Next up I stamped and cut out the Busy Bee stamp set & coordinating dies , the Build a Bee stamp set and coordinating dies, and the Bee-you-tiful sentiment set and coordinating dies. 
 I colored the bee images in with my Copic Blending Trio Markers on some Neenah Classic Crest Smooth 110 lb cardstock. 

I also put the Hampton Arts Mini Action Wobblers behind the two Build a Bees just to make the card that much more fun!
I hope you enjoyed my project today. It sure helped pick me up and get crafty again! Thanks for looking and have a fantastic day!!

Friday, April 28, 2017

Honey Bee Stamps Birthday Bash Surprise Blog Hop!

Hello crafty friends!! Welcome to Honey Bee Stamps 2nd Birthday Bash & SURPRISE Blog Hop!

Today I am sharing with you a fun Hive shaped card. Honey Bee Stamps released this fun hive card die today. What a fun interactive card. I love the options for the doors!!

I used my comic markers to create a textured background on the hive. The doors knobs are hexagons from the Hexagon layered background Honey Cut die set.

I used the Busy Bees, Build a Bee, and Free Bees sets to decorate my hive. The Free Bees are a customer appreciation gift with purchase.

And peekaboo! That sweet bee is behind the door to say hi! Lol!!
Be sure to hop along for all the fun, inspiration & prizes!!


Each stop on the hop will have a drawing for a free stamp set of the winners choice from the Honey Bee Stamps store. Be sure to comment at each stop to enter all of the drawings. The winners will be announced on the Honey Bee Stamps Blog on May 3rd at Noon PST.


Here is the lineup for the Hop:

Honey Bee Stamps

Jennifer McGuire

Stephanie Klauck

Amy Rysavy

Lisa Cisneros (You are HERE)

Sandy Allnock

Taniesa Vlasak

Yana Smakula

Nichol Spohr

Thank you so much for joining in on the fun! Make sure to leave a comment to be entered to win one free stamp set from Honey Bee Stamps.

Happy Hopping!!

Friday, November 11, 2016

Honey Bee Stamps November Release Honey Hop!

Good Morning Honey Bees! Welcome to our November Release Honey Hop!!!
All this week we have been showing you little sneaks of our awesome new embellishments, stamp sets and dies! Well, here they all are! Everything will be available for purchase today in our shop HERE.

For the new release I worked with the 10 Things stamp set and the Joy Honey Cuts. 


First I took Versamark ink and stamped the beautiful feathers out from the 10 Things stamp set. I embossed them in Guilded Embossing Powder from Brutus Monroe. 


Next I took my Altenew Crimson ink and my Clarity stencil brush to blend the color on my cardstock. 

Then I took my Versamark ink and inked the edge of the cardstock. I used the same embossing powder to add a gold distressed edge. 
Here is the finished card. 

I used the Joy Honey Cuts to create the title. For the final touches, I mounted it on a red card base and added pick Nuvo Drops. 
I hope you enjoyed my card. 


Oh and what’s a Honey Hop without some sweet prizes, right? One winner will win a gift certificate to purchase new goodies in the Honey Bee Stamps Store.
All you have to do to win is comment here on the Honey Bee Stamps blog and again at each one of our designer’s blog by Sunday, November 13th. Winner will be announced on Monday, November 14th at Noon PST.

So Hop along and get ready to BEE inspired! You should have arrived here from: Lesley Oman and next you will go to:Melissa Bickford

Thanks for Hopping along! I hope you enjoy it!!


BLOG TEMPLATE BY DESIGNER BLOGS